Tag Archives: Breast implant

Another one behind me

It has been over three years since I started this process. On January 22, 2013 I underwent a prophylactic bilateral mastectomy to greatly reduce my risk of developing breast cancer and started breast reconstruction. Since then, I had a few complications, due to which the process took much longer than planned.
not-this-shit-again
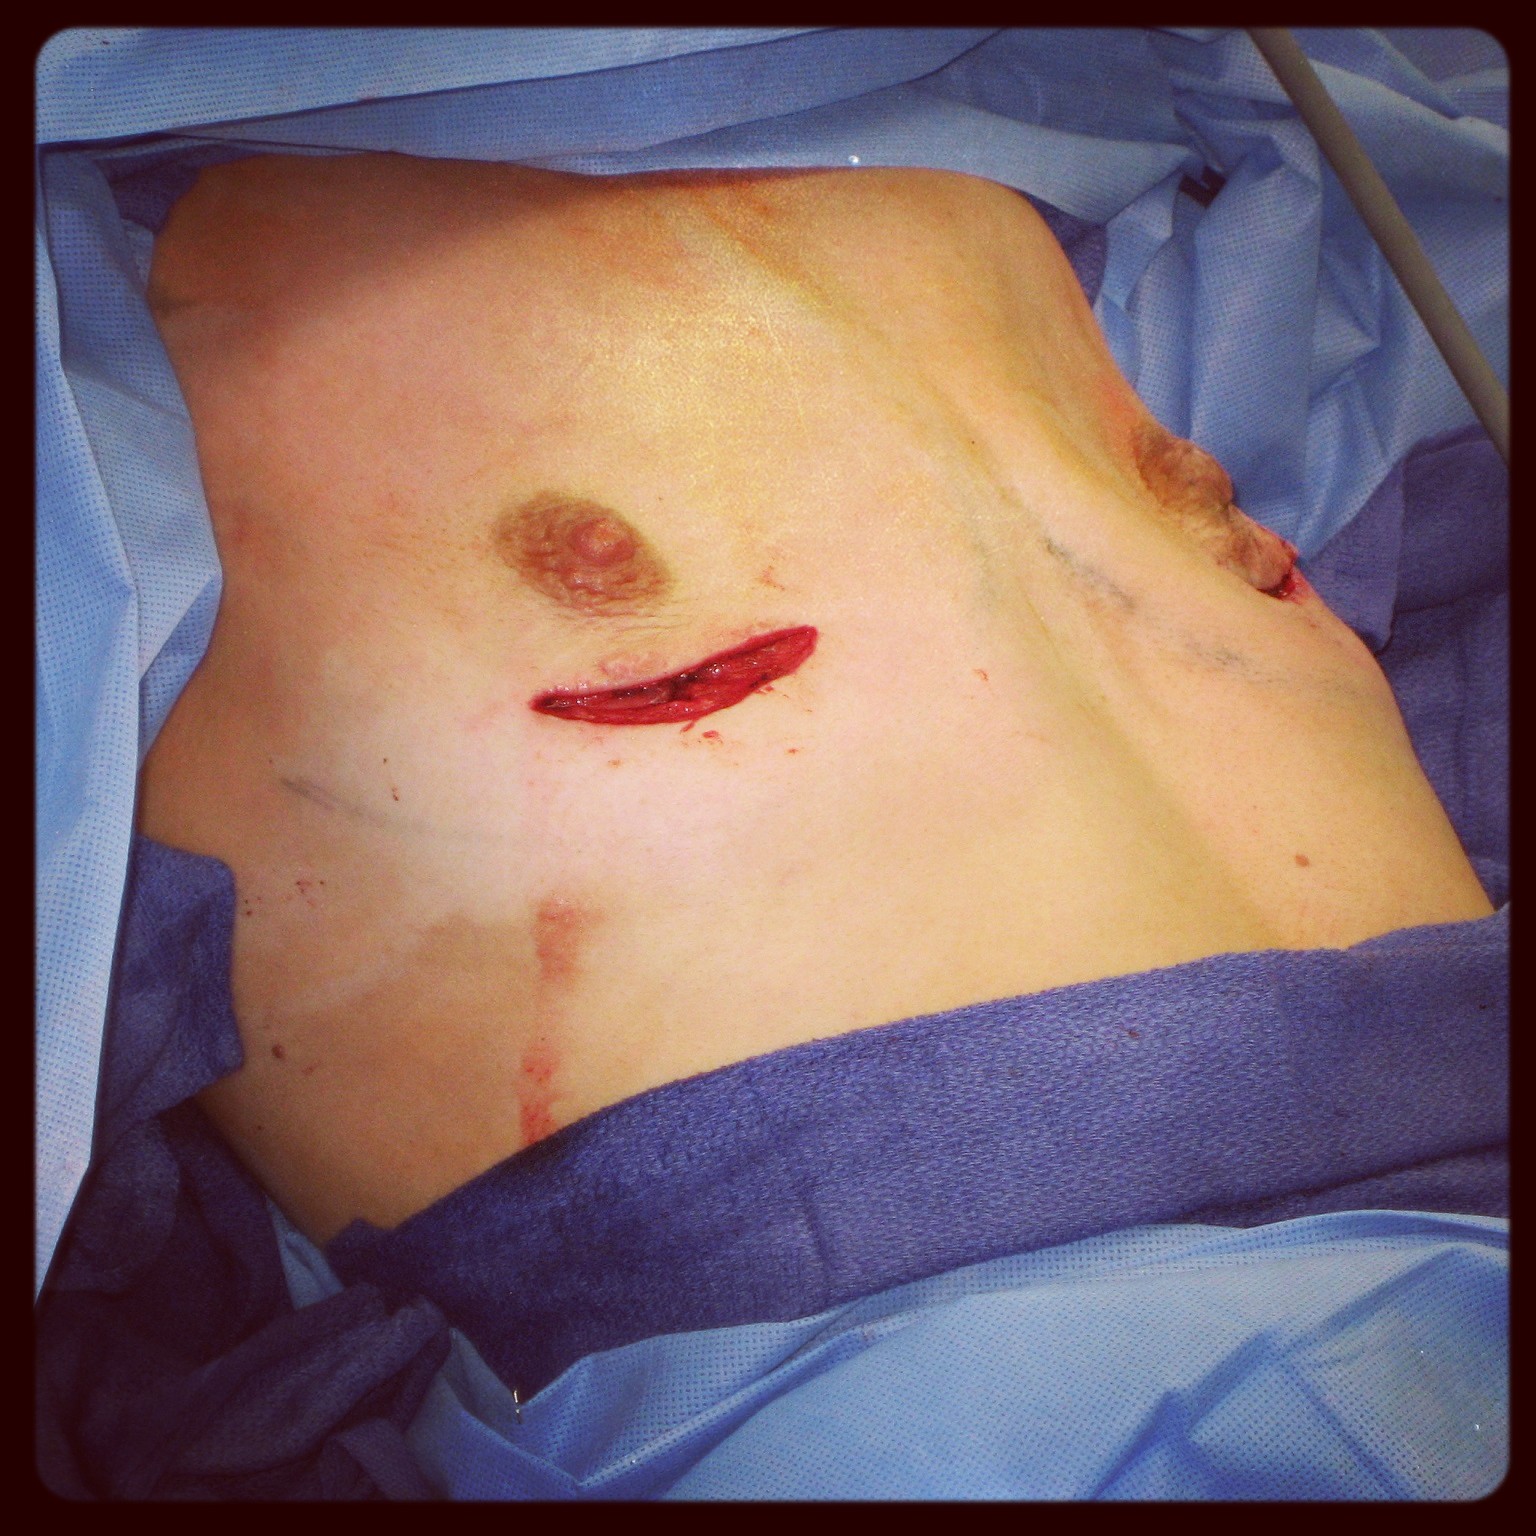
On March 1, 2016 I had my 9th surgery. Fun stuff!

Honestly, at this point, I’m tired of talking about it (and feel like my friends and family are tired of hearing about it too). I figured I should at least tell you boys and girls, since it is part of my process and well, this is what the blog is for: to document my journey.

What I thought was my last procedure was in July 2015, when we swapped the expander on my right with an implant. After that surgery, I received IV antibiotics for a month (see post: PICC life). Things cleared up and three months out I went on vacay to Mexico, where I finally was able to wear a bikini without an expander! I enjoyed being done and was very much relieved.

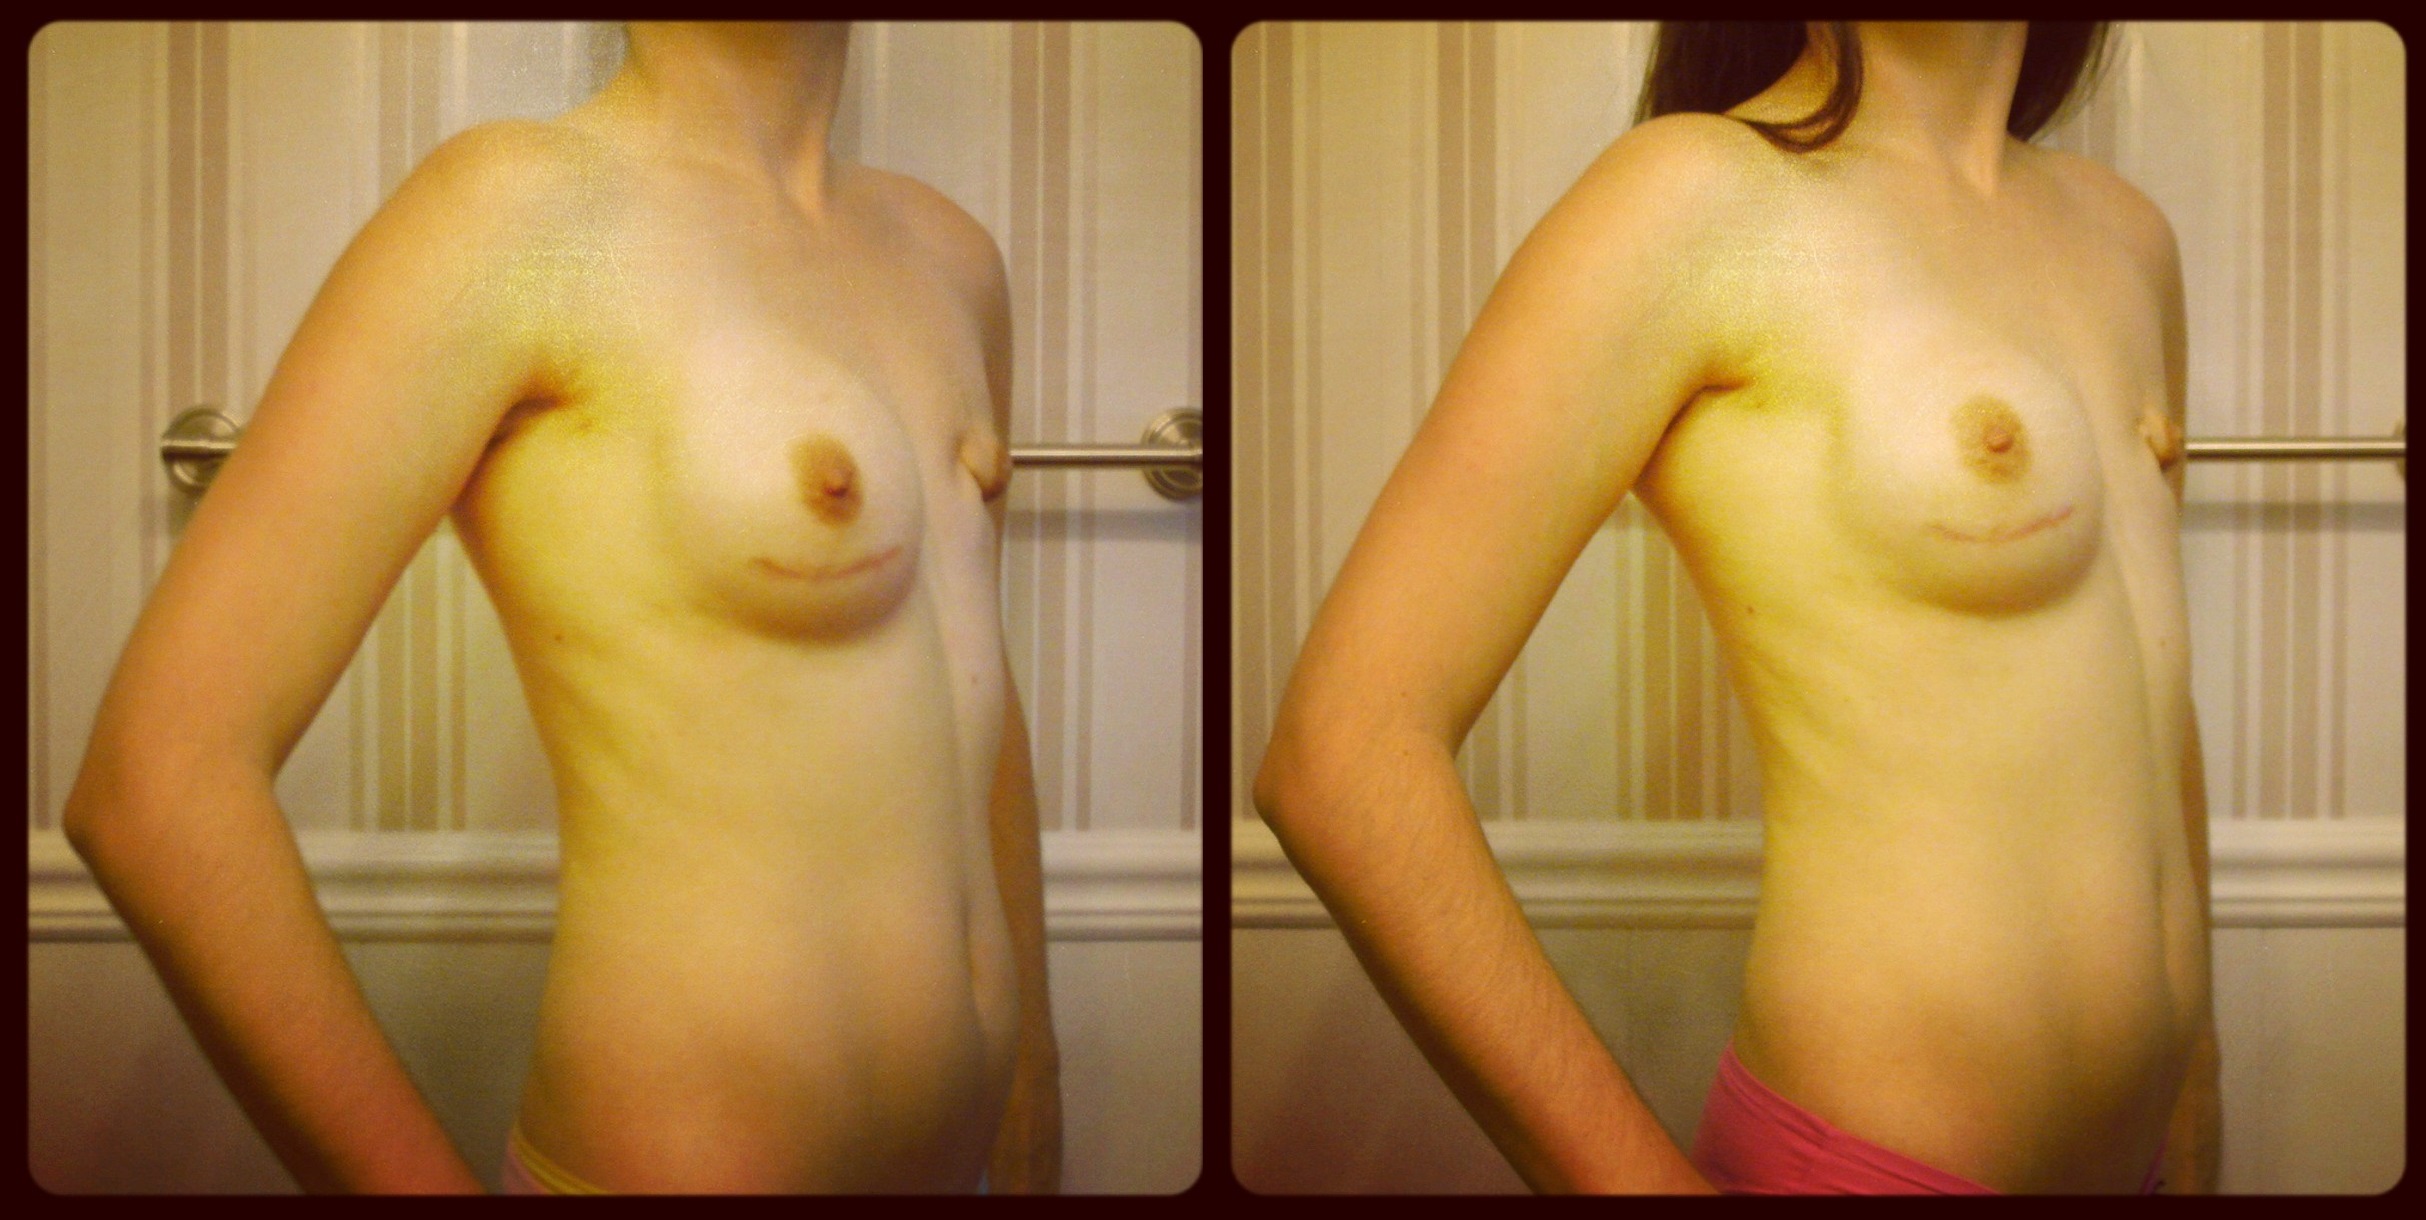
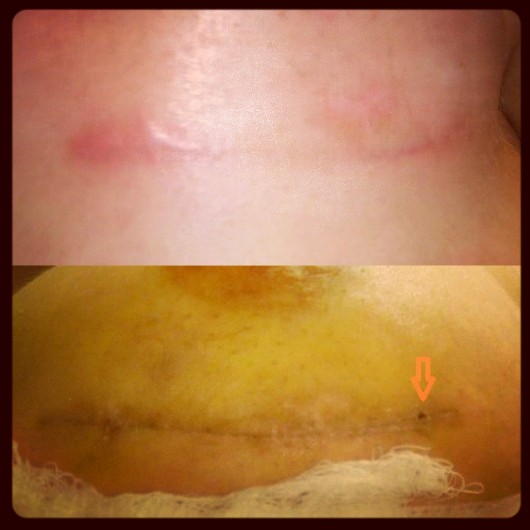
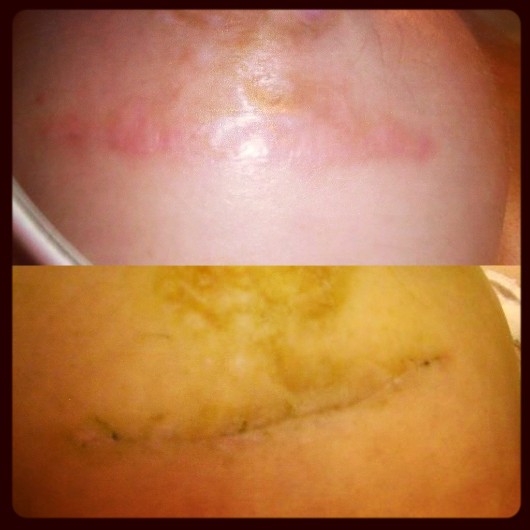
Shortly after, I noticed a bit of a divot above my right side. At the time I thought: no biggie, things take time to settle and it wasn’t really that bad. Over the next couple of months, the divot got deeper and the implant dropped lower. By January I knew that the implant had bottomed out and surgery was the only way to fix it. After consulting with my plastic surgeon, I scheduled the procedure. Over the next two months I went back and forth on whether I would actually have it. On one hand, I was displeased with the outcome and did not like seeing it in the mirror; on the other, I have experienced multiple complications and was afraid of the possibility of more issues.  I had it. The PS did a pocket revision; easy surgery and super easy recovery.

465t377Although the tone of this post may not be entirely positive, I am in a good place. I feel great and still have no regrets about having the PBM. Somebody told me that it wouldn’t be easy and they were right. Totally worth it, though. However, I won’t say I’m done, because I’ve already declared that a couple of times and was wrong. We shall see where this goes. So far everything looks good.

Happy ending?

WARNING: NSFW / graphic content below.

One week after exchange surgery, during which my right tissue expander was replaced with an implant, I am feeling fantastic! My recovery has been going very well and I like what I see. The surgery took a few hours; I was home by 2pm. I left the hospital in a bra and with a drain exiting my right armpit. I suspected I would have one, so while still a big bummer, it was not a surprise. The pain level was low overall (maybe a 3). The following days were uneventful. I spent the weekend home alone, mostly reading and sleeping.

Pain Scale

Drain tubeAlthough my level of activity was low, drain output was 80mL for the first couple of days, so it had to stay in a bit longer. During my second follow up appointment, on Monday, the drain was removed. About a foot of tubing, which was placed in the pocket around the implant, was pulled out (see pic on right: from the black stitch just under the hand, all the way down!). This is usually not painful, just weird. Good riddance! Feeling so much better with that thing out of me. Dr. M declared that things were looking good and ordered a follow up a week later.

So, how are things looking? You tell me!

2015_7_30

Mentor round, smooth, high profile, silicone in 450ccs. Left in pic: 1 week, right: 10 months.

IMG_3901I am still swollen and bruised (Arnica helped), but the result is pretty darn good, considering the circumstances. I’m hesitant to celebrate, however. With my history, I have a few more weeks to go until I can breathe a little easier. The issues I experienced after my last two exchange surgeries (see: Houston, we have a problem and Déjà vu) both happened about a month out. So, fingers crossed that this is my happy ending! I can’t wait to move on with my life.

Pain in my a…xilla

WARNING: NSFW / graphic content below.

No, it wasn’t all a bad dream; yes, I did get a tissue expander 😦

During my follow up appointment with Dr. M we discussed the reason for this: with nothing separating the pec muscle and my ribs, the tissue on my left breast adhered to them. This wasn’t a surprise, but Dr. M had to do some extra work to prep the pocket again. He went in through my armpit to avoid messing with the incision site that gave us necrosis and later the breakdown that caused an infection. He shared photos he took during the procedure illustrating the adhesion and how he separated and cauterized it:

cauterizedadhesion

TESSAincisionThis helps explain why my left side hurts so darn much! In addition to the internal sculpting, I also have a large incision and the drain tube in my armpit. Doing my best to not move my left arm! I’m still Norco-ing it up every six hours and the drain has been kicking out close to 100mL/day. I went in on Friday with the expectation that I’d be leaving it behind, but at this rate, I’m not sure we’ll be able to remove it when I go back on Monday.

Next steps?

So now what? Well, the right side looks great! The pocket closure and bump in size to 450ccs seems to have done the trick. The other side needs a lot of work to catch up, though. We must wait a few weeks for things to heal before we begin the expansion process. The tissue expander has 300ccs of saline and our goal is 550ccs (Dr. M over-expands). Last year’s expansions were in increments of 50ccs, every other week. Then we wait four weeks until the exchange, which puts us out to sometime in August. Here’s to another awkward summer!

prepostop

Now some good news …

I have been downing Sunsweet Prune Juice, oatmeal with flax, and lots of water in an effort to avoid that dreaded post-op constipation. I also tried Smooth Move tea for the first time. I am happy to report: I pooped today! 😀

pooping


Just some “fluffing”

WARNING: NSFW / graphic content below.

Well, it has been a month since I posted my last status update, because there really isn’t anything terribly exciting going on. I do have a photo for you to show you some “fluffing” I’ve noticed in my right implant, though.

I saw Dr. M for another follow up visit a couple of days ago and we agreed that the infection is no more. I have been redness-free for over a month, so I seem to be in the clear. My next appointment with him is at the end of March, which will be my pre-op visit, with the surgery to follow on April 10, 2014. TESSADuring that procedure my PS will attempt to replace the implant via a small incision in my armpit, using the TESSA technique (right). If he observes that too much scar tissue has accumulated in that space, he will have to place a tissue expander instead. We won’t know until he gets in there. It’s a log way away, but it’s not too early to start crossing fingers and banking those positive thoughts. Get on it! 🙂

As of today, it has been over three months since my exchange surgery and two months since the infection claimed my left implant (see: Houston we have a problem). The implant on my right does seem to be “fluffling,” meaning there has been a slight change in the perceived shape and size of the implant. What is actually happening is my body is changing around the implant forcing it into a different configuration, thus making it seem like the implant itself is actually changing. It is a gradual redistribution of the volume from top to bottom of the implant. The completion of this process may take from three months to a year. Here is the difference in just one month:  left = November 13; right = December 13.

Fluffing

Scar and surgery photos

WARNING: NSFW / graphic content below.

Had another follow up appointment on Friday. Dr. M refreshed the tape that’s holding up my right foob. We are going to keep doing this for a few more weeks in hopes that it will be enough for the scar tissue to form at the bottom of the pocket and close it up, BUT I may need another surgery anyway. We compared the two sides size-wise and found that we may need to swap out my right implant for a larger one. Plus, I still need to do something about this missing nipple, so yes, more OR time in my future.

He removed the strips covering my incisions, so I can now inspect them closely. They look 3049813476 times better than after the PBM. No necrosis in sight! I have a spot that looks a little bit like the start of a stitch abscess, so I will be watching it. Here’s what my scars looked like pre-exchange and what they look like now, 12 days post-op. Different lighting, but you can see that at the bottom that they are no longer angry red and keloid-ish.

Scars on righty   Scars on lefty

I also got a copy of my surgery pictures! It is really cool to see the changes from this angle. From left: 1. 184 g/ccs removed during PBM surgery (1/22/2013), 2. Expanders at exchange (9/3/2013), 3. One out, one to go, 4. Mentor round, smooth, high profile silicones in 350ccs.

PBM  Exchange 2 expanders  Exchange 1 expander  Exchange implants

So I think this is why my right foob seems smaller than the left one, even though the implant size is the same at 350ccs: I am concave/the hole in my chest is deeper on this side, so the implant sinks into the cavity more. We can’t do anything about it right this moment, though.

Concave front view   Concave side view

Headlights

WARNING: NSFW / graphic content below.

So this little trick popped up in the Facebook groups. Did you know that if you hold a flashlight to a boob with an expander or an implant, it will glow? Yes, yes I did try this myself. Gives a new meaning to HEADLIGHTS! The left is the image from i-am-bored.com circulating the groups; the right is my version. You can see the shade of the expander port in the top of the image. Creepy!

Headlights

Choosing implants

Saline versus silicone? Teardrop or round? Will high profile give enough projection? Choosing implants has been a popular topic in the Prophylactic Mastectomy Facebook group this week. While reviewing feedback of some of the other Ladies, I found myself questioning the choices I’ve made. After looking over my little list yet again, I reaffirmed that I have made the best decision for me. Here are the winners upvote and the losers downvote.

QuestionDisclaimer: Each person may give different levels of importance to the factors I list below and should discuss their options with their plastic surgeon. It is not my intention to convey that choosing anything different than what I chose is wrong. I am just presenting my logic. Right, wrong, or just plain stupid. 🙂 As always, I welcome your feedback!

Implant type

Factor Saline Silicone
Durability downvote upvote
Incision size upvote downvote
Chance of rippling downvote upvote
Natural feel downvote upvote
Sloshing downvote upvote
Leak detection upvote downvote

All the hoopla about the link between silicone implants and connective tissue disease, breast cancer, or reproductive issues is just that .. hoopla and unproven. It still caused the moratorium on use of silicone implants in the US in 1992, though. Because of this, breast implants are the most tested medical device out there. The moratorium was lifted in 2006. See FDA’s Update on the Safety of Silicone Gel-Filled Breast Implants for more details.

BreastReconstructionGuidebookTab6_1In any case, both types of implants are encased in a silicone shell. The one encasing the silicone implant is solid, but the saline one has a port (salines are inserted deflated and filled with fluid; silicones are pre-filled). Also, salines are more prone to ripple, causing folds in the shell. These two vulnerabilities are the causes of higher failure rates of saline implants. Although they come out on the bottom here, problems with silicone implants are more difficult to detect. Regular MRI screenings for “silent ruptures” are recommended for patients with these types of implants.

On the aesthetic side of the equation, the incisions needed for salines are smaller, but they are firmer and have been reported to produce a “sloshing” noise.

Implant shape

Factor Round Anatomical
Natural appearance downvote upvote
Natural feel/motion upvote downvote
Higher projection upvote downvote
Complication due to turning upvote downvote

From the various photos I have seen, I am not convinced that there is much difference in the aesthetic outcome, but in my head it makes more sense that anatomical (teardrop) implants have a more natural shape, so I gave them the upvote. While both shapes are filled with cohesive gel, the degree of viscosity varies between the round and teardrop versions. Teardrops may look better, but they are firmer due to the gel being more form-stable (read: solid). This consistency is what gives the implants the “gummy bear” moniker.

Whether saline or silicone, implants come not only in different shapes, but also either smooth or textured surfaces, as well as different projections. Due to the distribution of the gel within the implant shell, the same volume of silicone produces a higher projection in a round implant versus a teardrop one. The higher the projection, the narrower the base. With a 29″ rib cage, I need narrow implants and the round version offers the highest projection: ultra high.

And lastly, the fact that corrective surgery is required if the implant turns is a big one for me. When a round implant turns, you can’t tell, but if a teardrop is loose within its pocket, it is obvious. With the current state of my expanders (one sits higher than the other), I am nervous about this possible issue and want to avoid it.

So there you have it: I chose round silicone implants.

Check out this awesome video showing the difference between regular round silicone implants and their anatomical counterparts.

This is a video of me playing with a round implant that has been ruptured. You can see that this type of implant is also cohesive enough to not leak outside of the shell. It retracts just as the anatomical implant in the above video.

Source of Table 6.1: Steligo, Kathy. Breast Reconstruction Guidebook: Issues and Answers from Research to Recovery. Maryland: The Johns Hopkins University Press, 2012. Print, third edition.

Fourth expansion

WARNING: NSFW / graphic content below.

Another fill behind me. We took it back down a notch from 75 and added 50ccs to each expander, for a total of 350ccs/side. I’m not sure that you can see much of the difference in the photo, whic is at the bottom of this post.

I must say that I feel better after this fill than I did after the previous three. Typically I wake up on Saturday and it takes me a while to get going. This morning I didn’t feel much pain at all – no ibuprofen needed. I went food shopping and cleaned the whole house. I hope I don’t regret this tomorrow! Fingers crossed that this continues for the next four fills.

To celebrate my over-the-hump expansion (four down, four to go), I present to you: t-rex. In a previous post (see: Shower time) I joked that I had t-rex arms because of my limited range of motion right after the mastectomy. I could barely scratch my head (or butt) for a few days. I got this shirt shortly after. Enjoy!

Ask me about my t-rex

2013_5_10 fills

100 + 50 +75 +75 + 50 = 350ccs

They’re growing – first expansion

WARNING: NSFW / graphic content below.

Goodbye ugly scab, hello first fill!

The scab that has been living on my left boob has finally fallen off! Can I get a “woo hoo”? It has been two full months since my prophylactic mastectomy on January 22 and the start of my adventure with resulting skin/nipple necrosis. Today I had my first fill. 50ccs of saline were injected into each tissue expander, bringing the total to 150ccs/side.

Tissue expanderWhat are tissue expanders, you ask? The type of breast reconstruction I chose is two-staged: tissue expanders first, followed by silicone breast implants. The tissue expanders, which were implanted underneath my pectoralis major muscle during the mastectomy, get filled with saline on a regular basis to stretch said muscle and the skin that covers it, until the desired volume is reached. They are like “pre-implants.” Similar shape, but more rigid, unnatural, and uncomfortable. They have a round magnetic port in the top half, which allows for insertion of a needle, without compromising the expander.

Breast Reconstruction Guidebook Figure 7.1

The process of filling the tissue expanders is pretty quick and uneventful. First the nurse uses a little plastic contraption with a metal pin at the end to find the magnetic port in the tissue expander. Once the center of the port is identified, the nurse sanitizes the area and injects the needle attached to a syringe holding the saline. She then slowly pushes the plunger until all 50ccs of fluid have been injected into the expander. This takes less than one minute. After completing the fill, she places a little round band-aid over the injection site. Same story on the other side.

This procedure is overall painless (based on just the first fill). The only sensation was a brief sting as the needle was inserted into the port through the skin.Three hours later, I feel a little bit of that now-familiar pressure on the muscle and skin stretched over the expanders. As soon as I got home, I popped an ibuprofen, did some stretches, and smeared my chest with Palmer’s cocoa butter oil.

As I look down at my chest, I can see that my foobs are bigger. It is a small difference, but it’s there. It will be interesting to watch these things grow. I can already tell that it won’t be pretty. The expanders didn’t settle exactly the same way: one sits higher and the other one is a bit twisted. The asymmetry seems to be normal based on my plastic surgeon’s feedback and the photos other women have shared. Enjoy the visual!

Fills 2013_3_29

100 + 50 = 150ccs

The fills will continue every two weeks at 50ccs/side. At this point, I have not yet decided how big I want to go (one of my friends joked: “go big or go home!”). However, I did find out that my breast surgeon removed 184 grams of breast tissue/side, which translates to roughly 184ccs, so one more fill and I will be back to pre-op size. Next appointment: April 12.

Source of Figure 7.1: Steligo, Kathy. Breast Reconstruction Guidebook: Issues and Answers from Research to Recovery. Maryland: The Johns Hopkins University Press, 2012. Print, third edition.